
先上api链接:https://api.ninym.top
文档链接:https://ninym.top
快速开始
环境安装
首先既然是用python+flask,这两个东西肯定要装好的嘛~ Python的安装我就不讲了,主要说下flask
很简单,安装命令就一行
Linux
pip3 install flaskWindows
pip install flask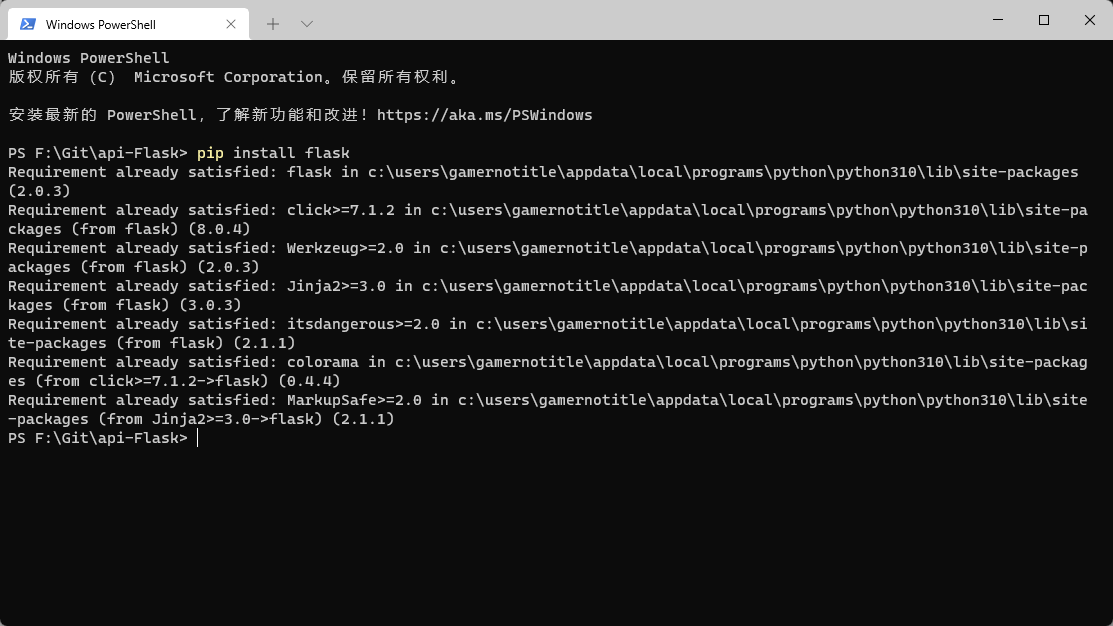
因为我这里已经安装过了,所以写的是Requirement already satisfied,如果没有安装过的话会进入安装状态
# Hello World
既然要用flask框架,那就首先要引用,在python中,我们可以使用import语句来引用外部模块
from flask import Flask当然可以在后面加上as xxx给它取个别名(特别是对于那些名字很长的modules,下面会讲)
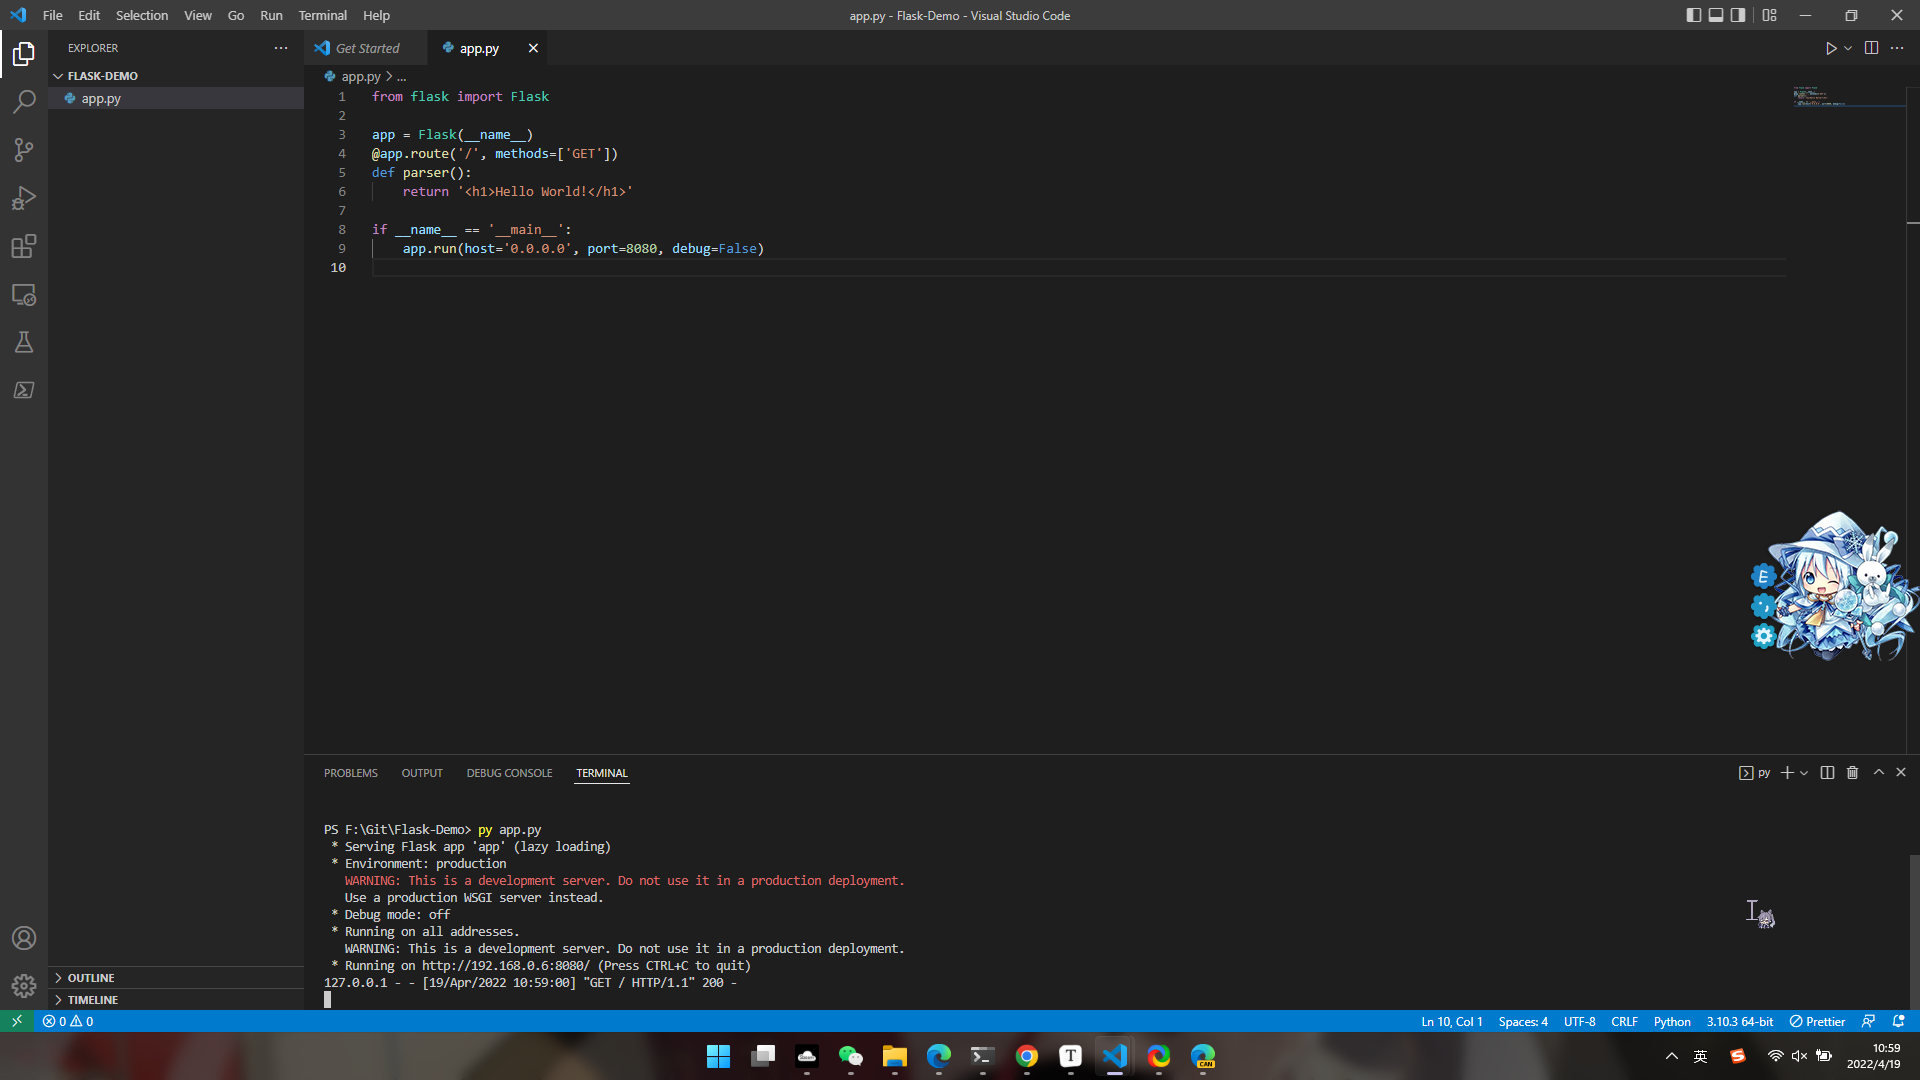
接下来我们创建我们的第一个flask程序
from flask import Flask
app = Flask(__name__)@app.route('/', methods=['GET'])def parser(): return '<h1>Hello World!</h1>'
if __name__ == '__main__': app.run(host='0.0.0.0', port=8080, debug=False)然后我们直接运行命令python <file>.py就可以运行我们的服务器了(Linux请使用python3 <file>.py,下面不再赘述,只讲Windows,Linux用户请自行替换)
然后我们在浏览器访问我们的网站,在这里可以使用127.0.0.1:8080访问,因为服务器就是部署在本机器上面的,打开后就会显示Hello World了
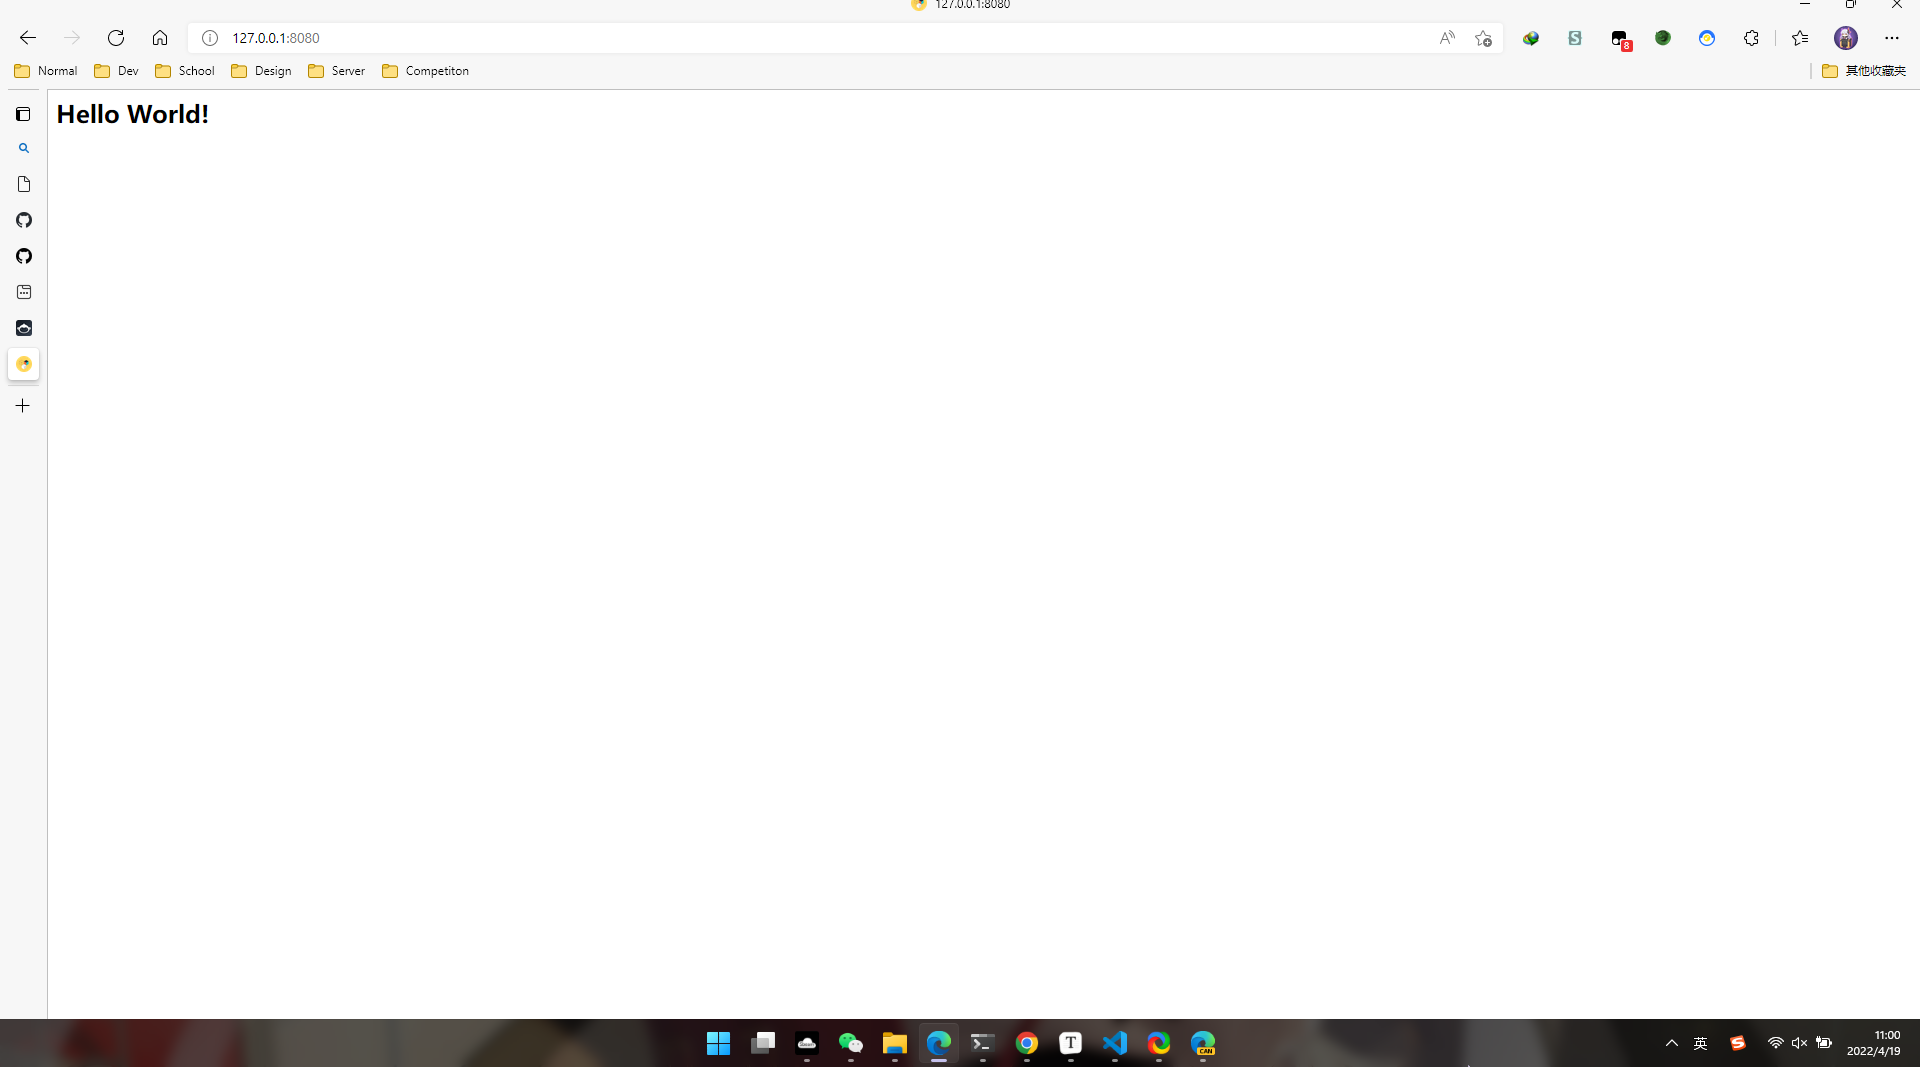
注:图标是我的浏览器本地缓存,正常情况下网站是没有图标的(因为没有设置)
太棒啦,你现在已经学会创建Flask程序啦!
我的Flask程序
网易云音乐下载
我在玩这个东西的过程中,主要是想把我的网易云音乐的API给重制一下(之前是用JavaScript写的烂代码,而且不会自动重命名,就想把这个功能完善一下),所以在我住院的期间,我就开始干起了这个东西。
首先先新建一个utils文件夹,里面放各种自制模块,然后新建了NeteaseCloudMusic.py来写我的这部分的代码
import requests as rimport bs4import osimport re
def NeteaseDownload(id, ContentType): if ContentType == 'attachment': song, author = FileInfo(id) # If the song id doesn't map to a song, this will return. if song == None and author == None: return False, 'Not Found', 'Not Found' base = 'https://music.163.com/song/media/outer/url?id=' file = './cache/' + id + '.mp3' filename = id+'.mp3' if os.path.exists(file): return filename, song, author try: stream = r.get(base + id, timeout=30) except TimeoutError: return False, None, None if 'u-errlg u-errlg-404' in stream.text: # Some VIP songs cannot be downloaded print( '[NETEASEMUSICDOWNLOAD] Failed while getting the resources and information of a song.') return False, 404, 404 print('[NETEASEMUSICDOWNLOAD] Getting song {} - {}, returned status_code {}'.format( author, song, stream.status_code)) with open(file, 'wb') as f: f.write(stream.content) return filename, song, author else: base = 'https://music.163.com/song/media/outer/url?id=' song, author = FileInfo(id) if song == None and author == None: return {'code': -2, 'msg': 'It seems that id {} is not a valid song id.'.format(id)} try: stream = r.get(base + id, timeout=30) except TimeoutError: return {'code': -3, 'msg': 'Timed out. Please try again later.'} if stream.url == "https://music.163.com/404": return {'code': 500, 'link': None, 'name': song, 'author': author, 'msg': 'Cannot fetch download link.'} return {'code': 200, 'link': stream.url, 'name': song, 'author': author, 'msg': 'Success'}
def FileInfo(id): # Get the information of the song, including name and author TargetWebInfo = r.get('https://music.163.com/song?id=' + id) html = TargetWebInfo.content bf = bs4.BeautifulSoup(html, "lxml") try: song = str(list(bf.find_all('em', class_="f-ff2"))[0]) song = song.replace('<em class="f-ff2">', '').replace('</em>', '') ForbiddenCharacters = [('\\', ' '), ('/', ' '), (':', ':'), ('*', ' '), ('?', '?'), ('<', ' '), ('>', ' '), ('|', '丨')] for i in ForbiddenCharacters: song = song.replace(i[0], i[1]) except: song = None try: author = str(list(bf.find_all('a', class_='s-fc7'))[1]) ReplaceLink = re.findall(r'<a class="s-fc7" href=".+">', author) for i in ReplaceLink: author = author.replace(i, '') author = author.replace('</a>', '') if author == '${escape(x.beRepliedUser.nickname)}': author = None except: author = None return song, author首先因为涉及到网络,所以就引入了一个requests模块(精简版的utllib),然后把我原来在JavaScript写的逻辑搬过来,就形成了NeteaseDownload这个函数,那就剩下重命名没搞定。因为手动解析网易云音乐的网页很麻烦,所以就用了一个叫做beautifulsoup4的模块来帮助我解析。在这里直接搜索<em>元素,限定class为f-ff2,这样就可以找到歌曲名;在用re寻找<a>标签下class为<s-fc7>的内容,这些元素和class都是通过分析网易云音乐网站的源代码获得的。当然当用户输入了非法的id的时候,在网易云上就无法获取到歌曲信息,这时候通过搜索作者中内容为${escape(x.beRepliedUser.nickname)}的情况就可以判断,向用户返回非法id的信息
接着在主程序中注册网易云音乐的解析器,给网易云音乐的API设定路径即可
from utils.NeteaseCloudMusic import NeteaseDownload@app.route('/<query>', methods=['GET']) # First path handlerdef parser(query): paths = ['song'] # All requests paths path = query.split('/') parameter = path[0] if parameter not in paths: # When the path not exists, this will return 404 abort(404) if parameter == 'song': id = request.args.get('id') ContentType = request.args.get('type') return NeteaseHandler(id, ContentType)Github RELEASE下载次数饼状图
这个用到了matplotlib.pyplot这个模块,上面说这种模块名字很长的就可以给它命个别名,所以在引入的时候就给它改了个名字
import matplotlib.pyplot as pltimport matplotlib # 本体,在后面颜色的设定用到了然后就是疯狂地写代码,Github的下载次数是有API可以获取的(不过有QPS就是了)
从Github获取次数后进行json解析,把RELEASE版本信息和次数提取出来,接着放到图片里就可以了,总之就是写成了下面这样
import requests as rimport matplotlib.pyplot as pltimport matplotlibimport numpy as npimport jsonimport flask
ReleaseBase = 'https://api.github.com/repos/'domain = 'dev.api.ninym.top'
def ghParser(operation, author, repo, ContentType): operations = ['release'] Error404 = { 'code': 404, 'msg': 'Invalid path gh/{}'.format(operation) } Error501 = { 'code': 501, 'msg': 'It seems that this repo has no any release'.format(operation) } if operation not in operations: return json.dump(Error404) if operation == 'release': release = Release(author,repo,ContentType) if release.isEmpty: return json.dumps(Error501) return release.Draw()
class Release(): def __init__(self, author, repo, ContentType): self.author = author self.repo = repo self.info = json.loads(r.get(ReleaseBase+self.author+'/'+self.repo+'/releases').text) self.ContentType = ContentType if len(self.info) == 0: self.isEmpty = True else: self.isEmpty = False
def getInfo(self): # For debugging return self.info
def makeDimensionList(self): self.ReleaseLabel = [] self.ReleaseDownloads = [] for i in self.info: Downloads = 0 TagName = i['tag_name'] assets = i['assets'] if len(assets) == 0: self.ReleaseLabel = None self.ReleaseDownloads = None else: for j in assets: Downloads += j['download_count'] self.ReleaseLabel.append(TagName) self.ReleaseDownloads.append(Downloads)
def Draw(self): self.makeDimensionList() plt.figure(figsize=(10,10)) # Make the circle to be a formal one matplotlib.rcParams.update({'font.size': 20}) # Change the font size of title if self.ReleaseDownloads == None and self.ReleaseLabel == None: values = [100] plt.title('No Any Downloadable Asset from {}/{}'.format(self.author,self.repo)) r = np.linspace(106,142,1,dtype=np.uint8) g = np.linspace(103,140,1,dtype=np.uint8) b = np.linspace(232,216,1,dtype=np.uint8) colors = ['#'+'{:0>2}{:0>2}{:0>2}'.format(str(hex(r[i])),str(hex(g[i])),str(hex(b[i]))).replace('0x','') for i in range(len(r))] plt.pie(values,colors=colors) plt.savefig('./cache/{}-{}.png'.format(self.author,self.repo)) if self.ContentType == 'pic': return flask.send_from_directory('./cache/', '{}-{}.png'.format(self.author,self.repo), as_attachment=False, download_name='{} - {}.png'.format(self.author, self.repo)) else: dt = { 'author': self.author, 'repo': self.repo, 'labels': self.ReleaseLabel, 'downloads': self.ReleaseDownloads, 'pic': 'https://{}/cache/{}-{}.png'.format(domain,self.author,self.repo), 'remark': 'The access to the pic will be removed when the service is redeployed or by the operation of administrator' } return json.dumps(dt) explode = [0.01] * len(self.ReleaseLabel) r = np.linspace(106,142,len(self.ReleaseDownloads),dtype=np.uint8) g = np.linspace(103,140,len(self.ReleaseDownloads),dtype=np.uint8) b = np.linspace(232,216,len(self.ReleaseDownloads),dtype=np.uint8) colors = ['#'+'{:0>2}{:0>2}{:0>2}'.format(str(hex(r[i])),str(hex(g[i])),str(hex(b[i]))).replace('0x','') for i in range(len(r))] plt.pie(self.ReleaseDownloads,explode=explode,labels=self.ReleaseLabel,autopct='%1.1f%%',colors=colors) plt.title('Downloads of {}/{}'.format(self.author,self.repo)) plt.savefig('./cache/{}-{}.png'.format(self.author,self.repo)) if self.ContentType == 'pic': return flask.send_from_directory('./cache/', '{}-{}.png'.format(self.author,self.repo), as_attachment=False, download_name='{} - {}.png'.format(self.author, self.repo)) else: dt = { 'author': self.author, 'repo': self.repo, 'labels': self.ReleaseLabel, 'downloads': self.ReleaseDownloads, 'pic': 'https://{}/cache/{}-{}.png'.format(domain,self.author,self.repo), 'remark': 'The access to the pic will be removed when the service is redeployed or by the operation of administrator' } return json.dumps(dt)然后还是一样在主程序中注册路径即可
from utils.Github import ghParser
@app.route('/gh/<operation>', methods=['GET']) # Github Handlerdef ghHandler(operation): Analytics(request) author = request.args.get('author') repo = request.args.get('repo') ContentType = request.args.get('type') if ContentType != 'pic' and ContentType != 'json': ContentType = 'pic' return ghParser(operation, author, repo, ContentType)部署服务
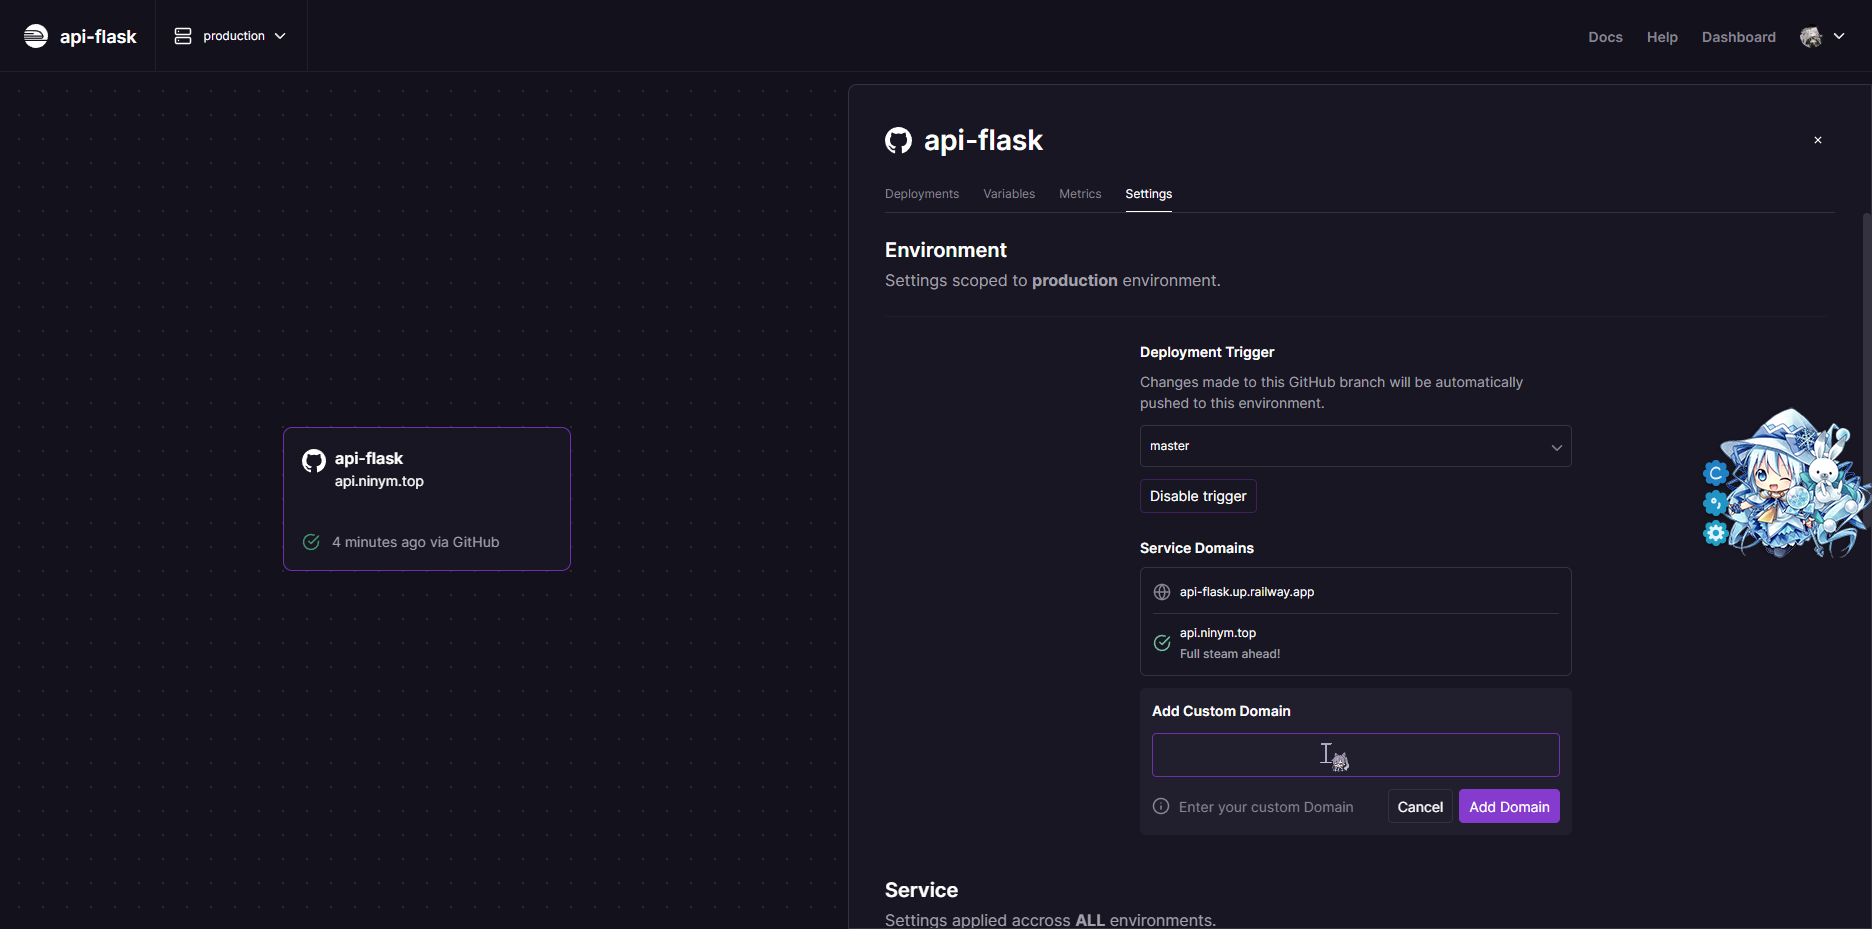
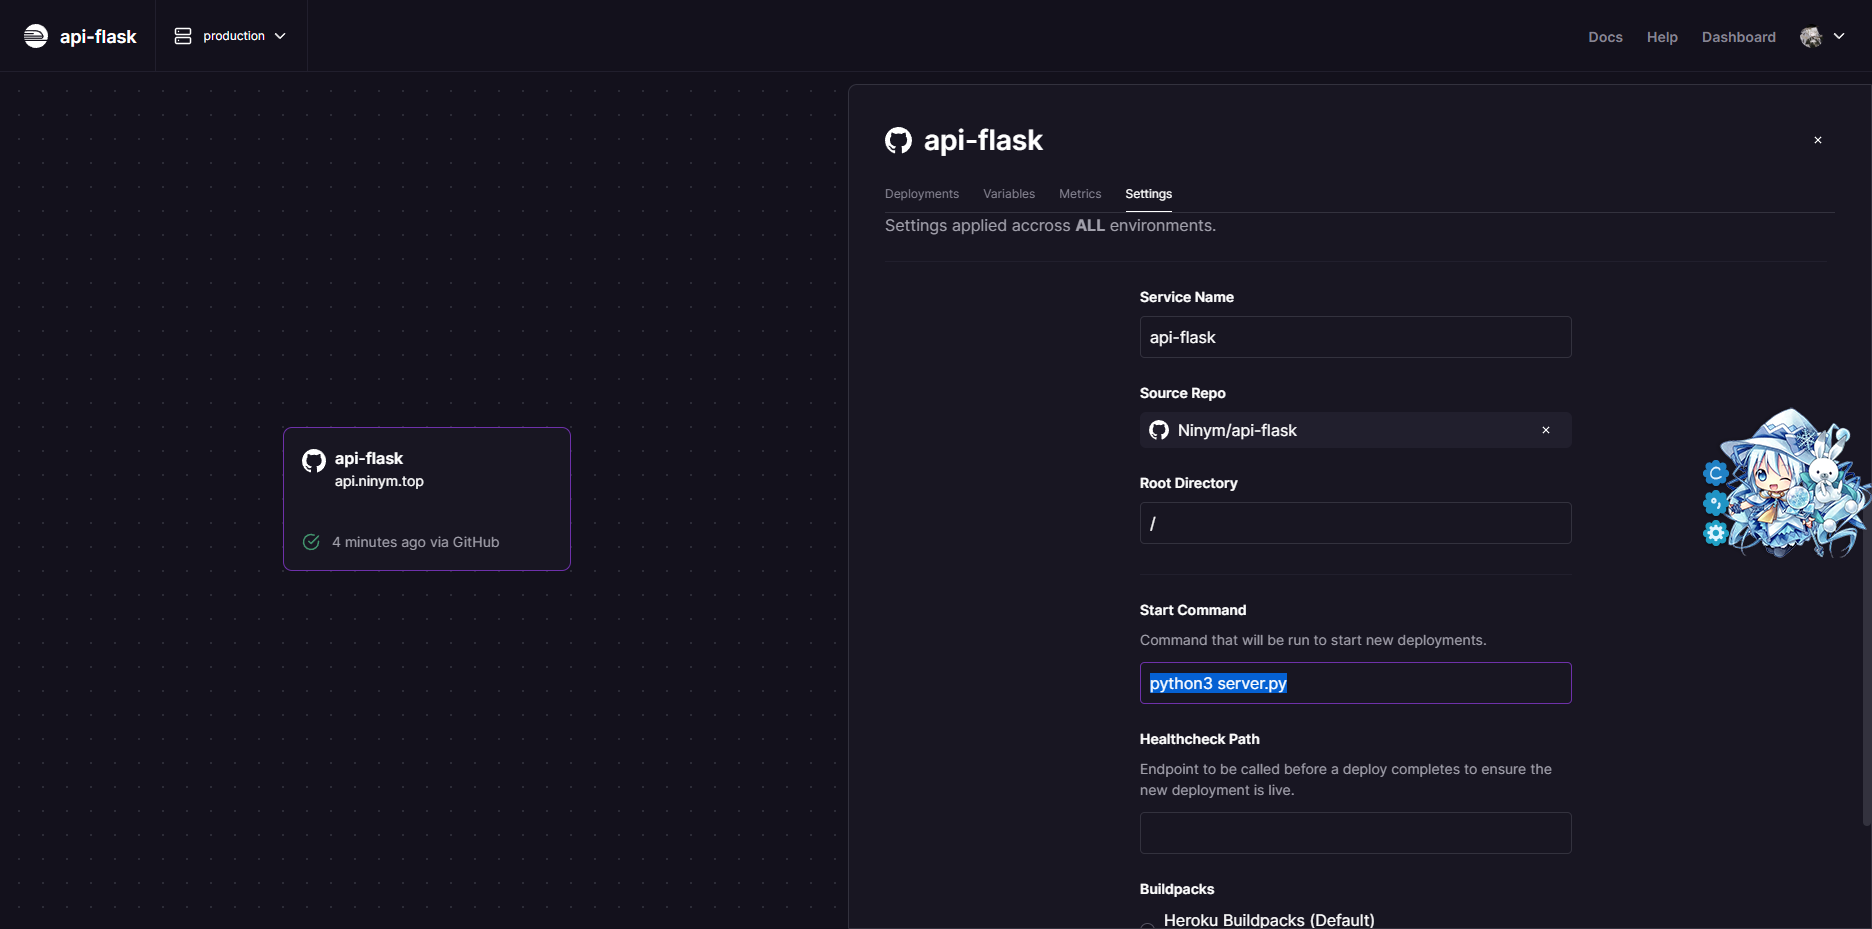
部署服务我选择的是Railway这个平台,相比于heroku来说比较快,而且不用绑卡就能绑定域名,很方便
在这上面新建环境,选择Deploy from Github Repo,然后选中自己的仓库就行了
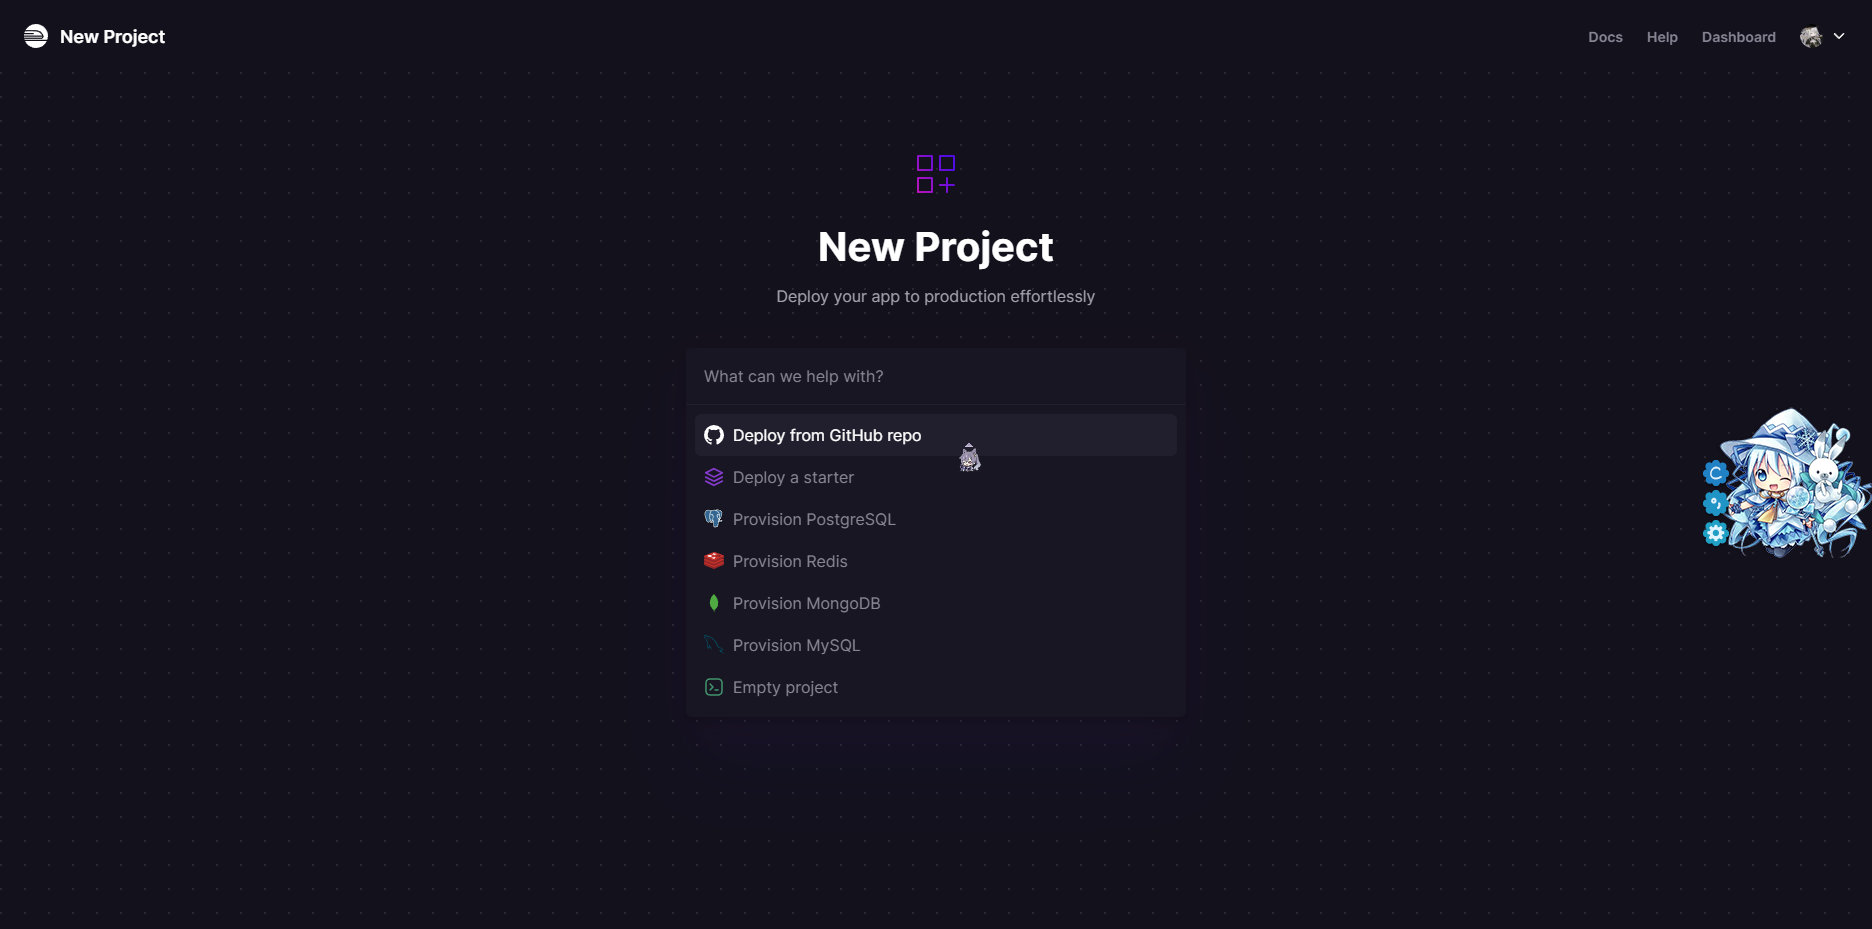
然后在项目的设置中进行自定义域名的绑定和启动命令的修改即可
结语
总的来说,用Flask还是比较方便的,何况我还是比较会用Python,能够做出很多奇奇怪怪的东西,但是就是缺少点子
如果你有什么想法也可以在评论区留言,我说不定会做出来呢?